


Prerequisites
- Administrator access to the Azure Portal
- Your Datazone instance domain (e.g.,
app.datazone.co)
Configuration Steps
1. Access Azure Portal
Log into the Azure Portal with administrator privileges.2. Create a New Enterprise Application
Navigate to Enterprise applications and click New application.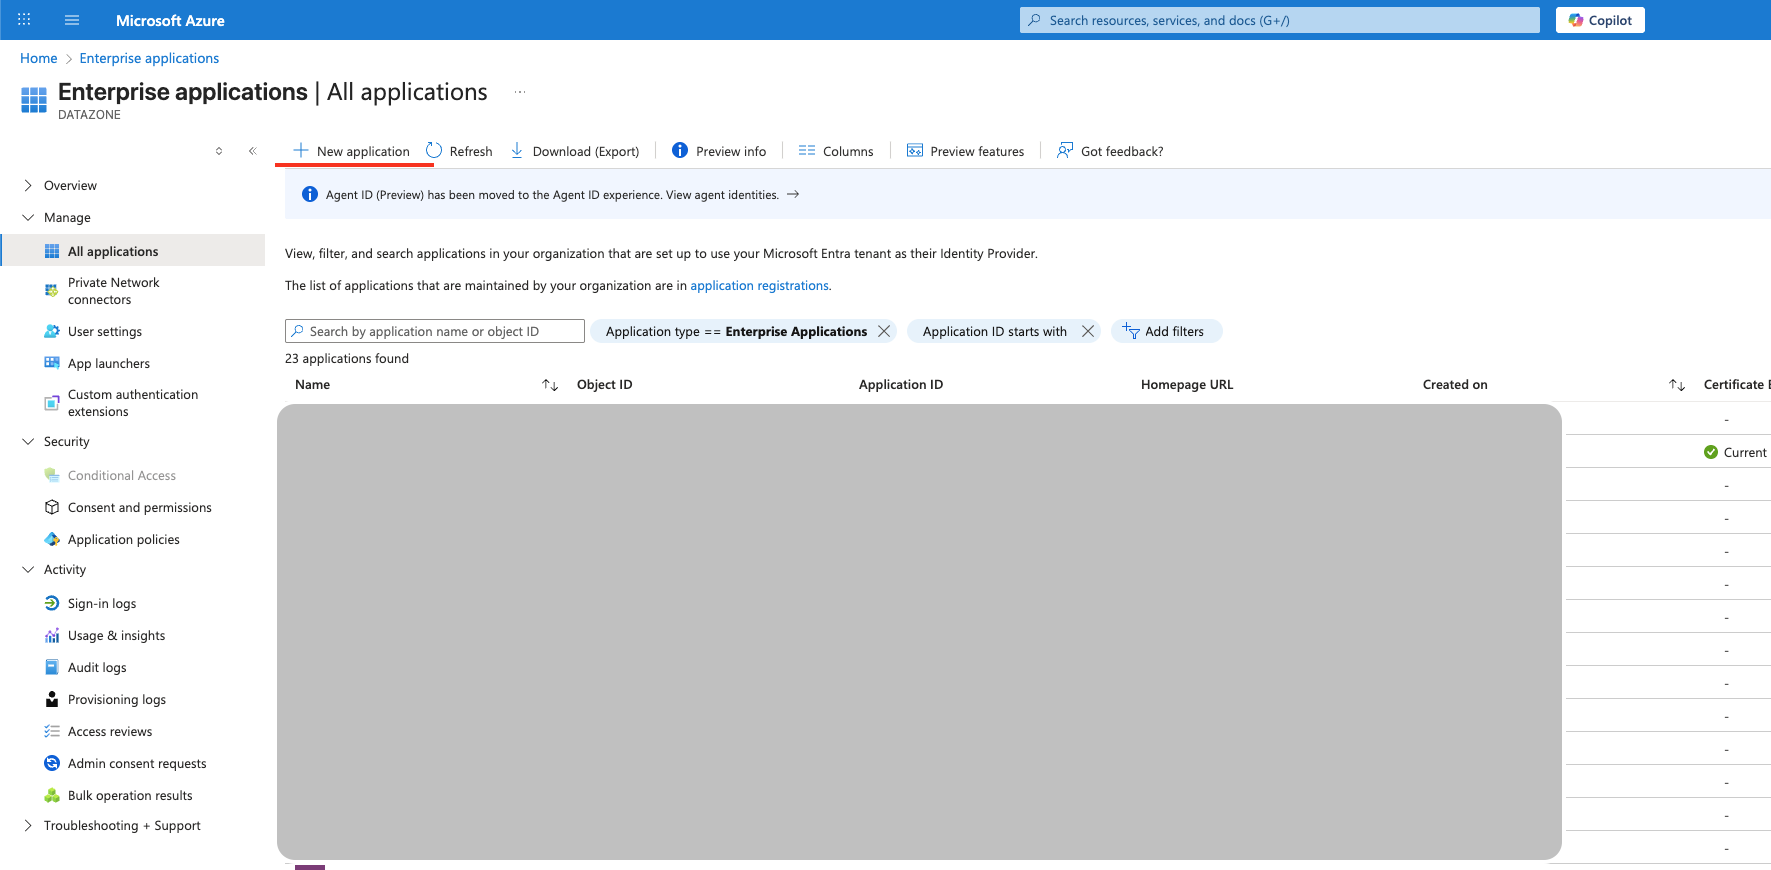
3. Create Custom Application
Select Create your own application, provide a name (e.g., “Datazone SSO”), and choose Integrate any other application you don’t find in the gallery (Non-gallery).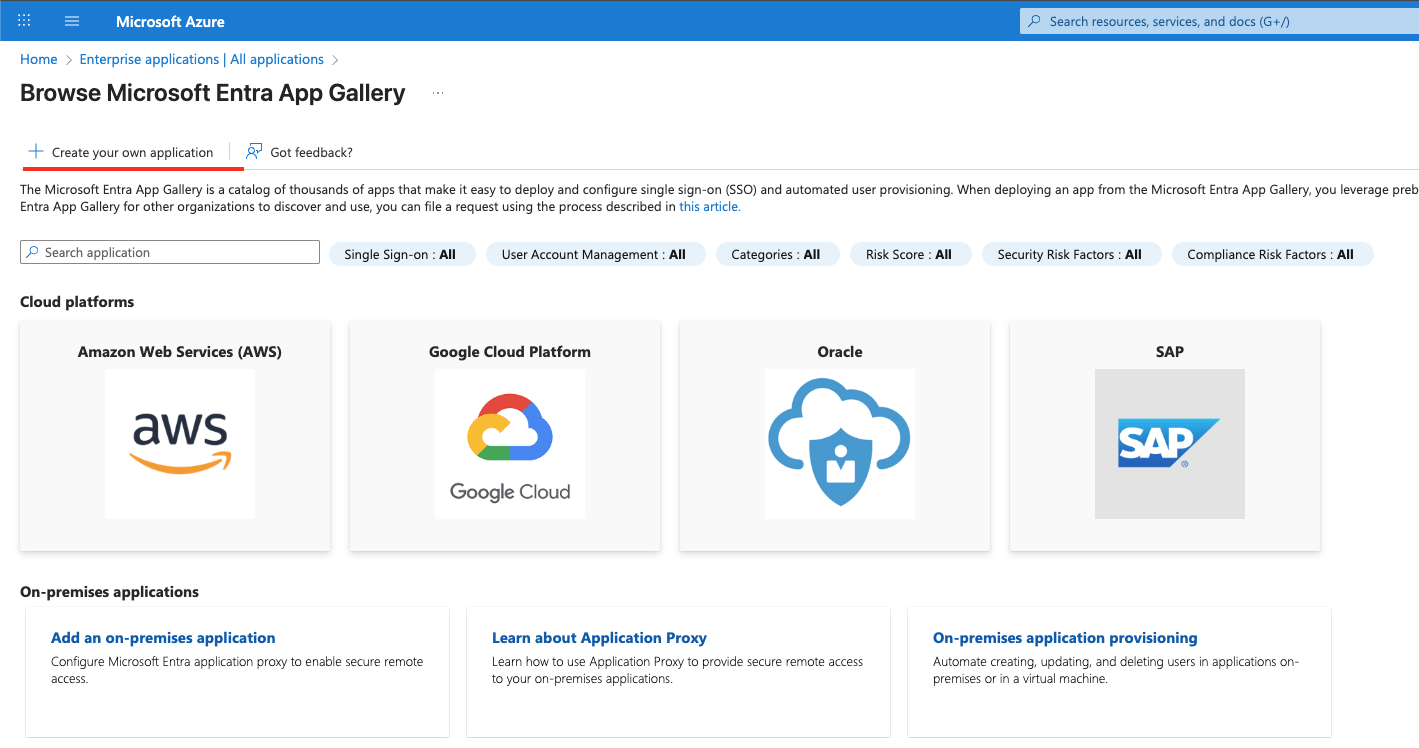
4. Configure SAML Sign-On
In the application overview, go to Single sign-on and select SAML as the sign-on method.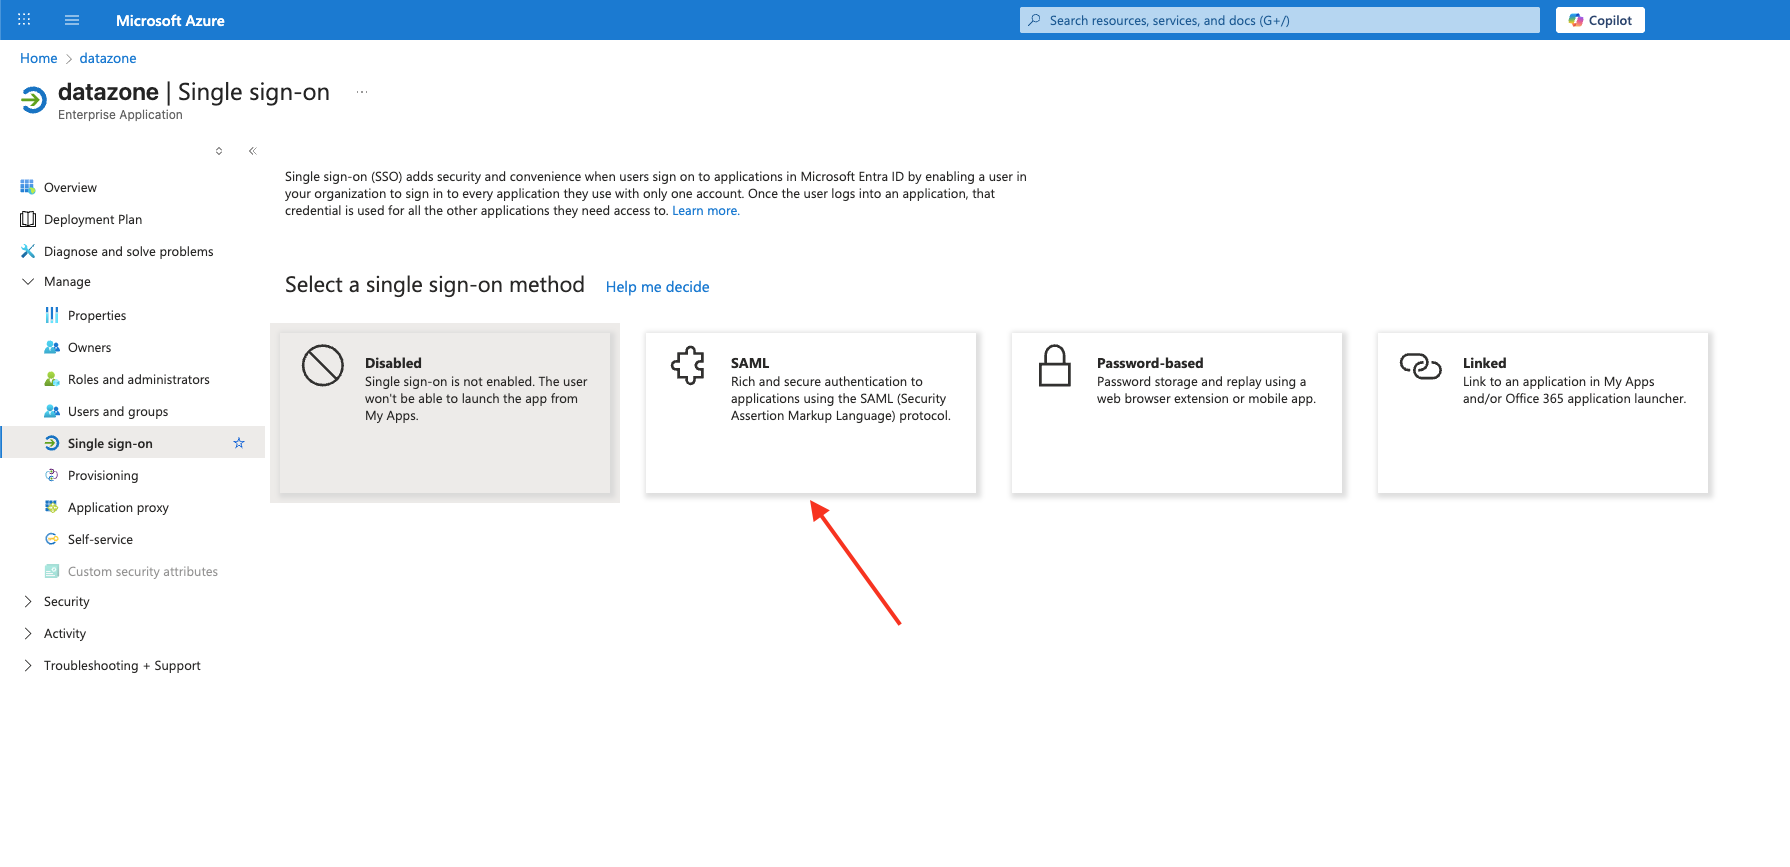
5. Configure Basic SAML Settings
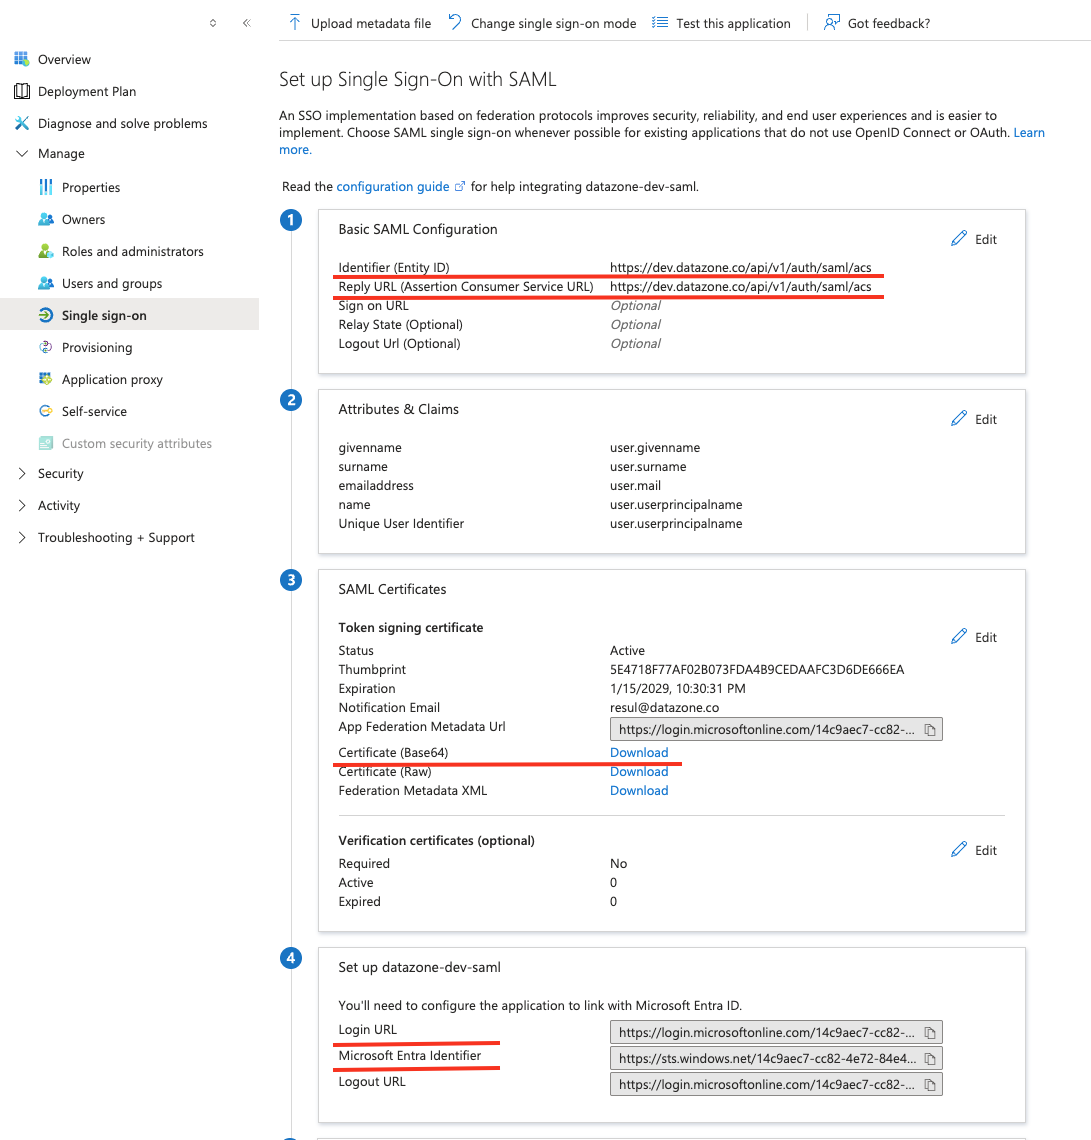
In the Basic SAML Configuration section, click Edit and set the following parameters:- Identifier (Entity ID):
https://YOUR_DATAZONE_DOMAIN/api/v1/auth/saml/acs - Reply URL (Assertion Consumer Service URL):
https://YOUR_DATAZONE_DOMAIN/api/v1/auth/saml/acs
Replace
YOUR_DATAZONE_DOMAIN with your actual Datazone instance domain.6. Collect Azure AD Configuration Details
From the SAML Signing Certificate section, gather the following information:- Login URL: Found in the SAML configuration
- Azure AD Identifier: Found in the SAML configuration
- Certificate (Base64): Download the certificate
7. Configure User Attributes (Optional)
You can assign users or groups to the application in the Users and groups section. Ensure that theemail attribute is mapped correctly for user identification.
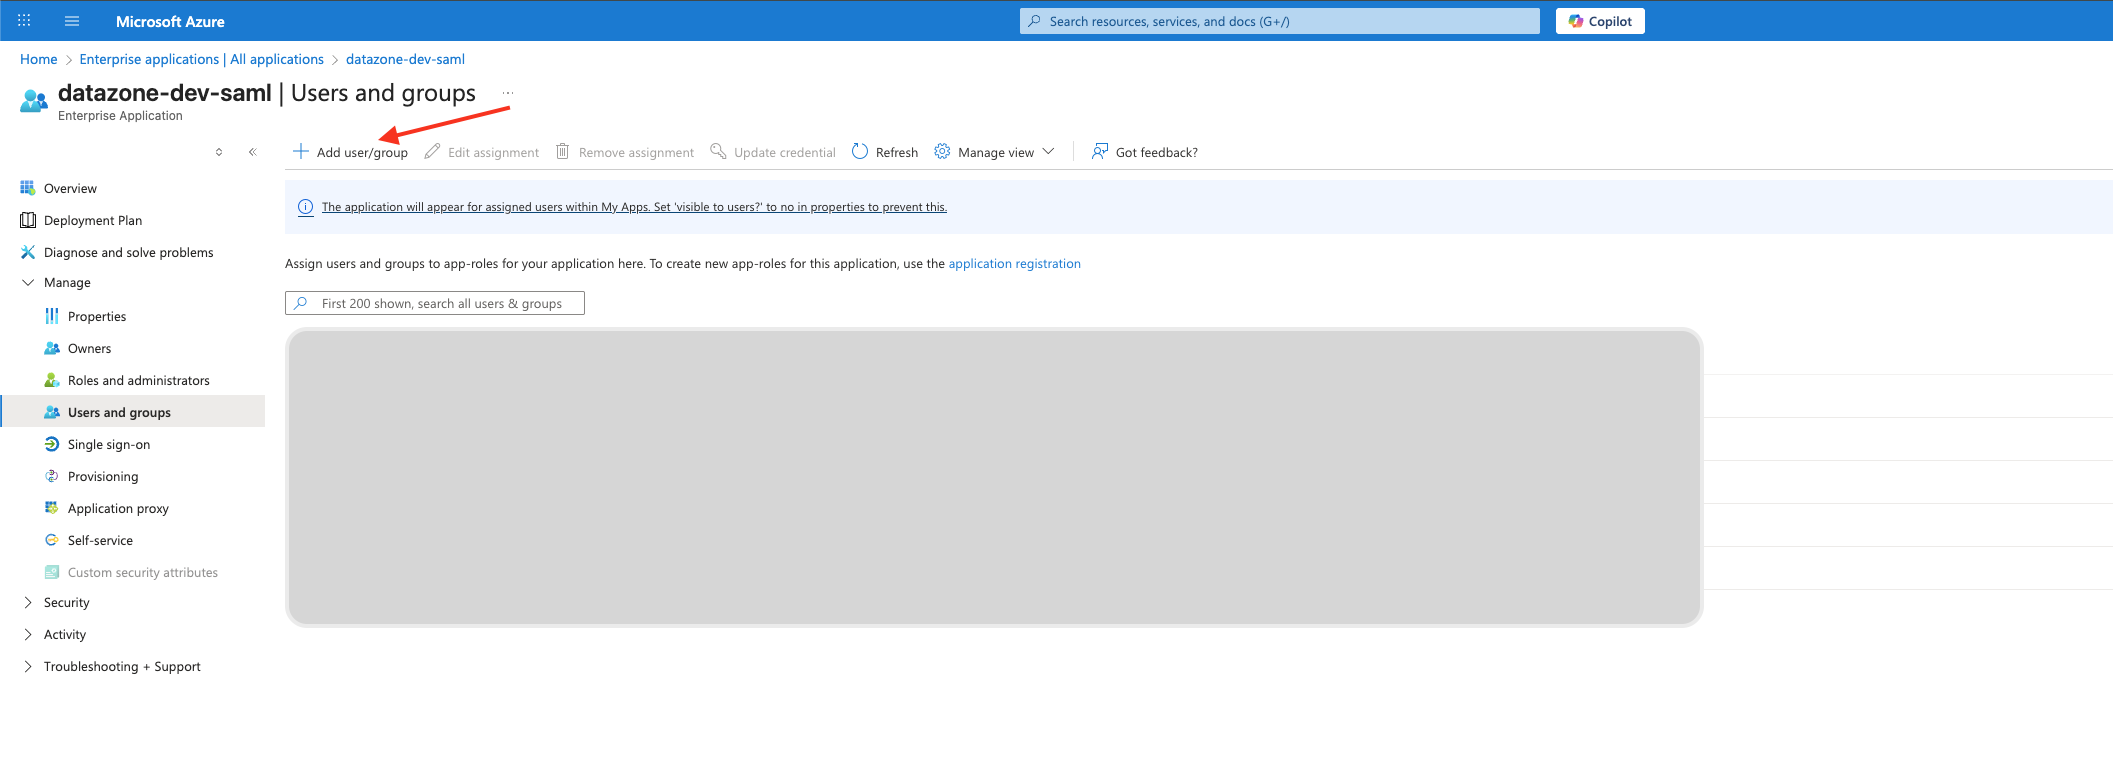
8. Organization Routing by Attribute (Optional)
If you have a single Azure tenant serving users that belong to different organizations in Datazone, you can let Azure decide which organization a user is signed into by sending an extra claim in the SAML assertion. When this claim is present, Datazone matches its value against your organizations:- If a matching organization is found, the user is signed into that organization.
- If the user does not exist yet, the account is created directly inside that organization.
- If the claim is missing, login falls back to the default organization behavior.
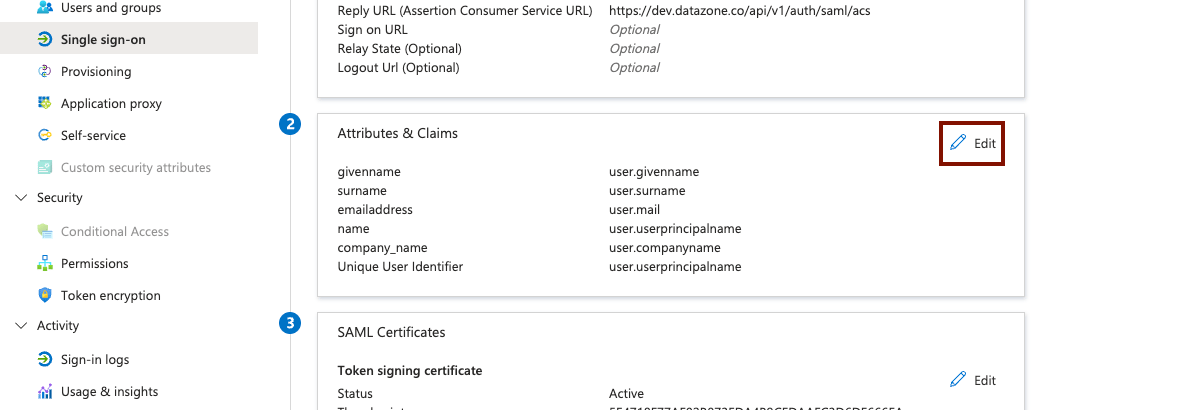
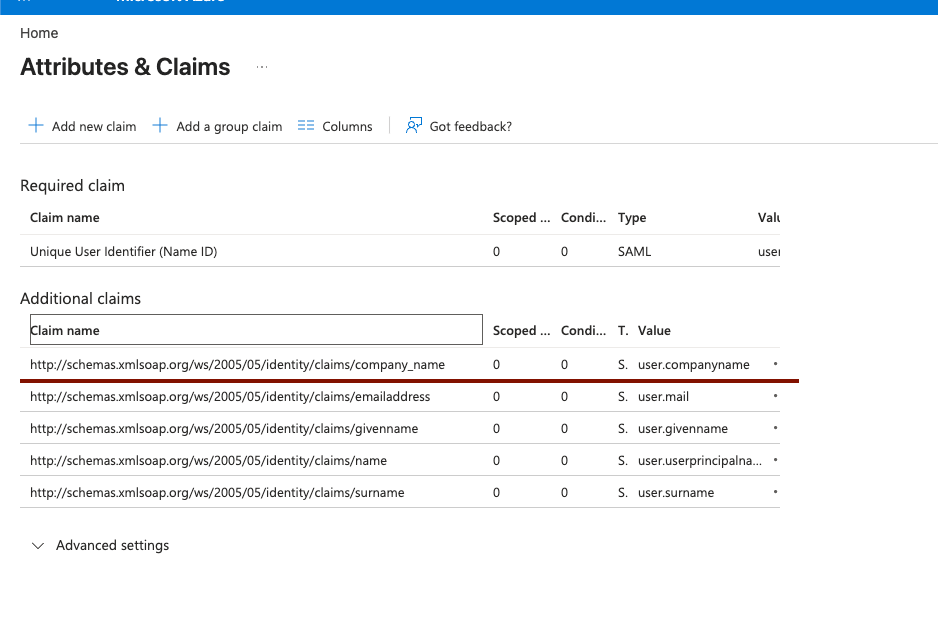
You can use any other user attribute or a custom claim name instead — Datazone only needs to know which claim to read.
Then, in the Datazone SAML configuration, enter that same claim name so Datazone knows which attribute carries the organization:
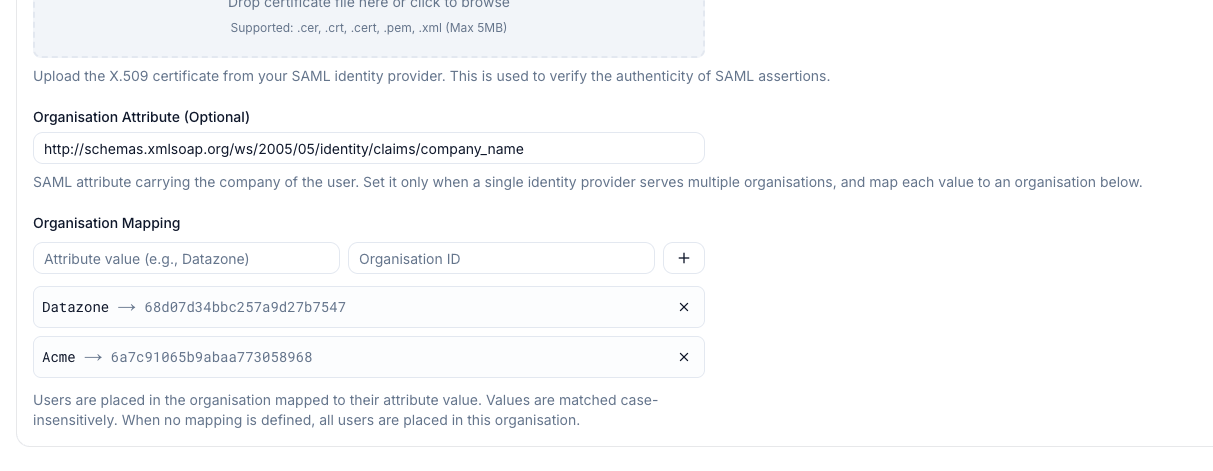
The claim value must match the organization name in Datazone exactly. Make sure
the
companyName field is populated for every user who should be routed this way,
otherwise their login falls back to the default organization.9. Enter Configuration in Datazone
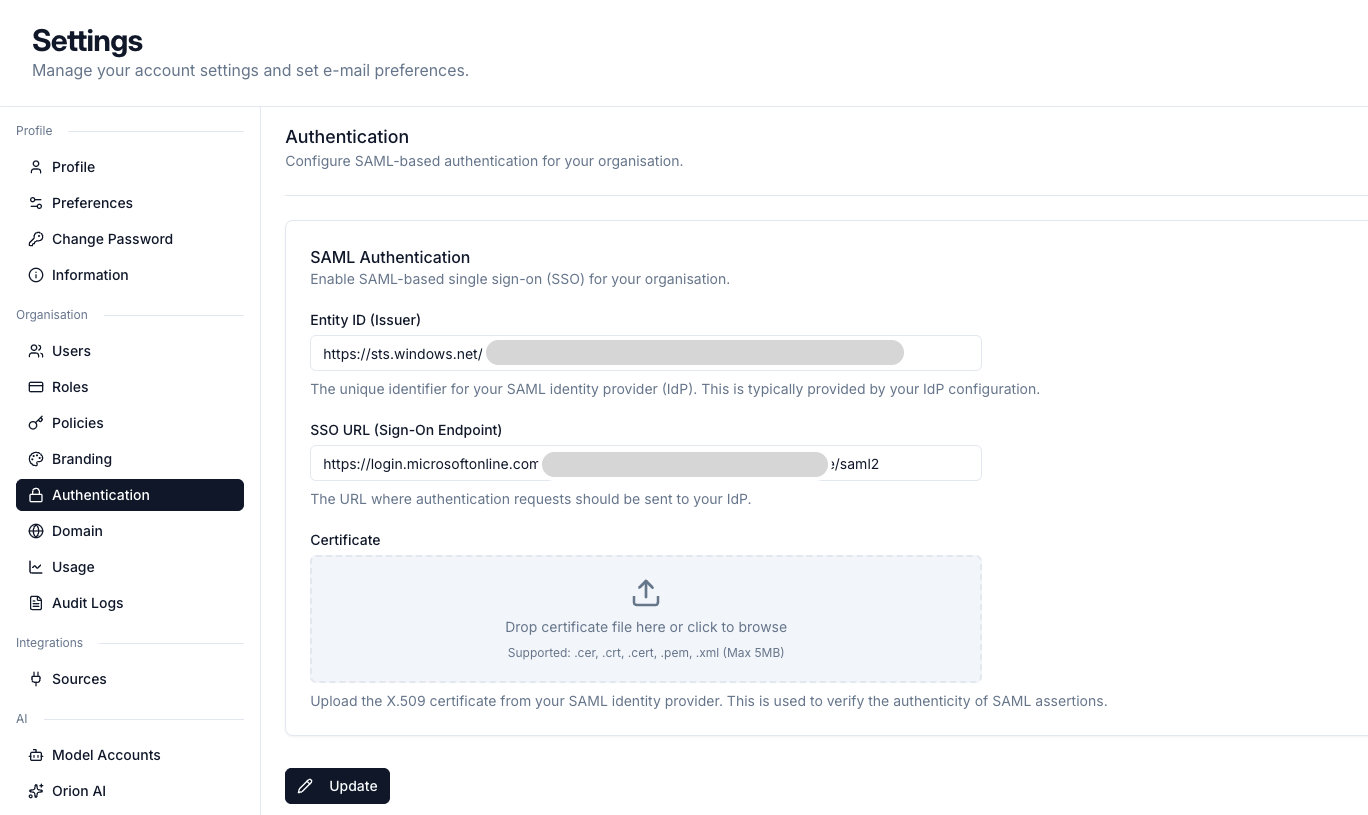
Finally, enter the collected information into the Datazone SAML configuration settings as described in the SAML Overview guide:- Entity ID (Issuer): Use the Azure AD Identifier from Azure
- SSO URL: Use the Login URL from Azure
- Certificate: Upload the downloaded Certificate (Base64)
Testing Your Configuration
After completing the setup:- Navigate to your Datazone login page
- Click on the SSO/SAML login option
- You should be redirected to Microsoft for authentication
- Upon successful authentication, you’ll be redirected back to Datazone
If you encounter any issues during setup, refer to the SAML troubleshooting
guide or contact support at support@datazone.co